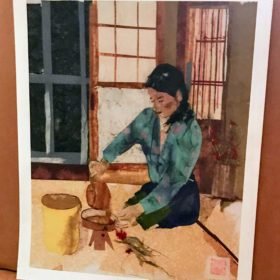
Working with Layers
How to Layer Your Design With the Best Results
If you stopped by chigirie.com last week to read my Tuesday Chigirie tip about working with your background, now’s the perfect time to take a moment and review that tip. We’ll briefly focus on working with paper this week.

Take Your Time
This Chigirie Tip of the Week shows you how to work with layers. Many designs require at least two layers of paper. The Chigirie shown above was created on a large sheet of watercolor paper but art paper is typically more difficult to work with. Your paper could have some rather unsightly raised areas if you apply too much paste. Allow your first layer to completely dry before you apply another layer over it.
Don’t look at those raised areas as a total loss
What should you do if the edges of your paper curls?
After your paper is completely dry, place a large book on top of the raised area. Most times, the weight will flatten your paper.
Achieving the perfect balance of water and glue takes practice. The water to glue consistency should be thick enough to cover the edges of the paper you are affixing to your art paper but completely spreadable.
Apply the tips you’ve learned here at Chigirie.com in my new members-only Facebook group. Sign up for my online Chigirie art classes at https://www.facebook.com/groups/LearnChigirieWithJoanMatsui.


